Saturday, December 24, 2011

Happy Holidays and Happy Gaming One and All

Hello everyone.  I would like to take a minute away from the usual 40k post to say thank you to everyone who has come to my little site and expressed interest in the projects I've put forth here.  There have definitely been times I've come close to setting the site aside, but I've always come back seeing the support of you all.  2011 has been a great year in which I've learned a lot about what I can pull off scratch building for Warhammer 40k (and what I need to work on!), and I look forward to seeing what I am able to do for 2012.

I'd also like to give a quick shout-out to the Santa Cruz Warhammer Honor Roll.  If you haven't seen the various honorees, you really should!  This is a fantastic site that does a great job highlighting some of the other great 40k (and other things) content out there.  Often times the great efforts bloggers put forth can get lost in the sea of blogs available.  This is a thank you to them, and a thank you to the other sites too numerous to name which spend a post each week or so covering so many other great sites.

Have yourselves a safe and happy holiday season, no matter what holiday you celebrate.  

Monday, December 19, 2011

A Librarian Dreadnought Joins the Fray

Welcome back one and all to Scratchbuilt 40K!  The last few weeks I've been spending my free time away from Warhammer related ventures (as one friend calls playing Skyrim 'Chasing the dragon').  However, I have had the chance to put together and paint a Librarian Dreadnought for the Pride of the Emperor army.


This model's arms are removable and the waist is magnetized to allow the model to pivot.


I recreated the faces on the base using InstaMold and resin and adding it to the base.


I would rather have had the Force Weapon painted using the airbrush, but sadly that is put away as Wisconsin winters are not kind to airbrushing outside.  This, however, turned out better than I thought it would.


Well, that's it for this week.  I know it's not much of an update after 3 weeks of silence, but it's all I could get finished in that time.  Till next time, happy gaming!

Thursday, December 1, 2011

No post this week

That's right.  Nadda.  Nothing.  Zilch.

Well, other than this.

Taking a week off 40k to play Skyrim to my heart's content.  Next week I'll have images of the Librarian Dreadnought WIP.

Monday, November 21, 2011

Quick post- Turning Assault Terminators into Sanguinary Priests

After examining my army list, I decided to go all out and have 3 Land Raiders.  To squeeze in the third Land Raider, however, that required dropping the Assault Terminators.  This actually turned out in my favor as I could then turn them into Sanguinary Priest models.


The power sword I made using plasticard for the blade and chopping the thunder hammer top half off and removing the wires to the arm.


The hip pieces are made using melta bombs sanded down and cut in half.  I also chopped the claws from the left hand, all except the bottom one.


Finally, the light at the top was put together using the top half of the hammer, chopped the square section off and added a light from that weird little generator thing (what is that thing?) which came with the assault Terminator sprue.

So there we go, some nice and quick Sanguinary Priests (or really the equivalent) without spending $25 for each of them.  Hopefully I'll have some time to paint one of the Mk1 Landraiders for next Monday, though with Skyrim in my possession, that may be hard to do!

Monday, November 14, 2011

Some site changes and painted Predator

Hello and welcome back to the site.  I'll get into the changes, but first I want to show off the images of the Predator I've been painting.


As you can see, I'm still using the same color sets as the space marines from the Pride of the Emperor chapter I've been building, though in this case I've focused more heavily on the browns and the blacks.


The front head lights are turning out better than I had hoped, as well as the windowed areas.


You may not be able to tell, but my lines are not as straight as I'd like them to be, and I find the process tricky  no matter how careful I am.  I tend to make a lot of mistakes doing it and need to go back and thin lines down.

Still need to paint the gun wires and add small details like chapter numbers.  I'm not sure how detailed I'm going to get on the Predators, though.  The problem with getting overzealous on tanks is when you have 7 of them you have to be overzealous on all of them or it looks out of place.

So, on to site changes.  You may have noticed the background has changed to a somewhat darker color and the title has changed.  This is only the beginning as I'll be fiddling with the site layout and finding the colors which best suit the site as the month goes on.  Hopefully in the end the site will look and feel better to everyone who visits.

Until next time, happy building and gaming all.

Monday, November 7, 2011

And then there were Razorbacks

Welcome back all.  Over the last week I've been able to find the time to throw together 3 Razorbacks for the Pride of the Emperor (counts-as Blood Angels) army I've been building.


As regular readers will probably notice right off, the Razorback uses the same frame as the Predator, which is, of course, based on the Space Marine Rhino.  There are a few differences, mainly in the side doors, small door at the top, and the weapon load-out at the top.


For the Razorbacks I put together a custom made las cannon/twin linked plasma gun to work with my list.  The plasma guns were made initially using sculpey, wire, plasticard, and a small metal circle.  I then cast the piece in InstaMold and recast using resin.


I have yet to make the exhaust pieces at the sides, but this is mostly how they look.  Again, another set of vehicles that will need painting, and I'm hoping I can find the time!

Monday, October 31, 2011

Unpainted Finished Scratch Built Space Marine Predator

Well, here it is, the finished Space Marine Predator I've been working on for the last couple weeks.


I may create covers for the rear portions of the side las cannons.  The two las cannons and the top turret are removable for easy storage and transport.


For the rivets I used stick pins cut at the appropriate length and glued into position.  I also added a vent at the rear under the turret and a stick pin antennae.


Now I only hope I can find the time to paint it!

Friday, October 28, 2011

Things are progressing nicely

Right now the Predators are progressing nicely, with the las cannon side turrets attached and the top autocannon turret.


The tank treads were cast using a mold I made ages ago out of resin and curved while still soft.  Additionally, the top hatches were part of the same mold, which made casting them together easier.

The top turret was made using two 40 mm bases making up the bottom portions and 2 pieces of foam board cut at various angles and the styrofoam areas covered with plasticard.  The barrel was put together using a copper tube, 2 sided tape, and pen casing.  Pen casings are becoming my favorite tubing material, since it is easy to cut, shape, and adjust.

Well, that's what's been keeping me busy this week.  I'm hoping to finish the details on the Predators tonight by adding rivets and perhaps smoothing the edges down.  If I can create the side exhaust pieces and recast them quickly, then the pieces will be done and I will move to resize the Rhino to better fit the actual size of the model.

Till next time!

Friday, October 21, 2011

From Daemons to Space Marines

Welcome back one and all to my little corner of the blogosphere.  I've yet again gone back to the hobby army of Space Marines I had previously set aside to rebuild a Tzeentch Chaos Daemon army.  Enough of this talky stuff, time for some pics!


I've jumped back into painting the Terminators, using this lightning claw laden beast as the template for future Terminators.  Again, there is room for additional details to be added later should I feel the desire, but for the most part this is how it will look.

Wednesday, October 19, 2011

Vacation time is over

As the Tzeentch Daemon army comes close to 2,000 points, I look back at the other project army I began a few months ago: The Pride of the Emperor (counts-as Blood Angels dual Land Raider army).  For now, though, the Tzeentch army is almost complete.


As you can imagine, remaking a 2,000 point army can be a little time consuming.  The Horror heads were shaped using the drum Pink Horror model and sculpting flames from Sculpey, then casting 29 models from resin to form the troop core.  Roughly half the Flamer of Tzeentch models were also resin cast, forming 18 models to make up the Elite options.


Finally, I created chariots using plasticard, chains, and some bases I have sitting around.  All of model bases were sculpted and cast using resin as well.  The Soul Grinders are... well... Soul Grinders.  Really nothing special about that!

Overall the army is pretty much complete.  There are a few touch-ups which could be done here and there, but for the most part the army is ready to display and maybe even play.  I now have my fluffy mono-god Tzeentch Daemon army.  It's taken me a couple months to complete, but I am ecstatic with the results.

That brings me to my previous project put on hold, though.  I put this army to the side due to frustration in painting the vehicles, and I'm not sure I've solved the problems I was having.  I'm hoping a few tutorials on tank painting might help me to discover where I'm going wrong and what I can do to get them to match the troops.

Hopefully next week I'll be able to start the Las Cannon- Plasma gun scratch build tutorial.  Till then, take care and thanks for following along on my journey!

Monday, October 10, 2011

Blue Scribes and Tzeentch Chariot paint progress

Hello everyone.  The other week I started repainting the Blue Scribes model I threw together last year.  This is where they are so far.


The images aren't as clear as I would like, but I was losing light fast (busy day!).  Up next is the scratch built Tzeentch Chariot I put together.


I used plasticard to make the disc, the blades, and the wood harness.  The wood I scratched up with a metal piece to create the look of wood.  The tentacles coming out of the sides of the chariot are made from milliput rolled over night and left to harden.

That's it for today's post.  I'm hoping to have some time to work on a second chariot (and maybe paint some more).

Saturday, October 8, 2011

Home built Tzeentch chariot in progress...

Although the Horror heads are making good progress, I thought I'd add the Tzeentch chariots I just started working on.


As you can see, most of it still needs painting and some chains would be a great addition, but for 2 hours work tonight I think it has come a long ways.

Monday, October 3, 2011

Making it all come together

Evening all!  Today I'm going to cover the hobby progress I've made with the army I've been rebuilding and share some images with all of you.


This is where the floaty head Horror of Tzeentch are right now.  It's obviously in the early stages, but the plan is to transition from the blue body to red/yellow flames on the head.  There will also be a lightening in areas of the face and detail work done for the eyes and the teeth.  Twenty eight of these may take me a couple of days to complete, though.


This is the Flamer of Tzeentch attached to the detailed base from the other day.  I've applied all seventeen Flamers to their bases, but have a detail to add to various bases.


This is the beginning of the chariot base.  Of course, I haven't built the chariot yet, but that will come with time I'm sure.


This base will be for the Blue Scribes.  The disc they ride is way too big for a regular infantry base, so I opted for a terminator sized base.


Finally, finished the sword for the second Soul Grinder.  Still may do a bit more detail on the skull bit, but for now this is a finished product.

Overall, a lot of progress has been made over the last four days.

Friday, September 30, 2011

Floating head flame horror progress

Thought I'd drop a few pictures of the progress I've made in my quest to have floating heads for my Horror of Tzeentch units.  Overall I plan to have 30 Horrors (28 for the troops choices and 2 for blue scribes... still no idea how I'm doing that one).  Every one of the pieces I'm using is resin cast and ready for assembly/trimming.

This piece I've already begun trimming.  Next will be fine trimming, fixing any errors, and filling in the gaps.  Hopefully in the next couple days they will all be ready for priming/painting!


The bottom piece is indeed the drum Pink Horror from the old days.  The top of the head is resin cast from a mold I made using Sculpey and attempted sculpting flame from (which I'm horrible at!).  Here's hoping it looks nice after primed and painted.

I look forward to having 30 floating heads deepstriking onto the board alongside 17 Flamers of Tzeentch.

Thursday, September 29, 2011

Ignore that last post

In the last post I sent out a request for help from you, gentle readers.  However, I think I found a solution to my conundrum.  What I wanted was a flame type model to represent my Horrors (fitting in better with the general Tzeentch theme of the army instead of the old big hand horrors).  The current solution involves...

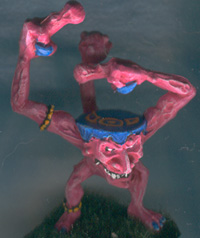
Not my Horror...
I will take the 3 or so of these I have, chop off the arms and legs, and add flames to the top of the head area.  Later today I'm going to do some shopping around to find toy campfire flames that will fit in that area.  That way I'll have my floating horror flame balls which fit better with the whole army concept in general.  As they progress, I'll be sure to document my failures and successes along the way!

Wednesday, September 28, 2011

A request of help from readers

Hey everyone, I'm in a bit of a situation and need your help.  As you know, over the past couple of weeks I've been trying to upgrade my Chaos Daemon army, an all Tzeentch group.  What I have discovered is that while I love the old blue horror models, I am really looking for something which really fits their warpfire nature. 

What am I hoping to find?  I'm really hoping to find is a model which resembles the bombs from the Final Fantasy series games.  I've already started searching some of the various miniature companies for elementals and other things which might be able to work, but I am not good at this search thing.  If you have any ideas, please let me know!  I will need a little over 30 or so, so finding a decent price (or easily replicated) model would work best.

Thanks everyone for your time and here's hoping I can find something which fits better in the army!

Tuesday, September 27, 2011

Making your own figure bases: Daemon landscape

I learned long ago that the bases for your models can make or break how good your army looks.  Making a particular theme to fit with your army can take a really nice army and make it a fantastic one.  Today we'll see how to do this with just 2 part epoxy, some Insta-mold, and 2 part resin.  Final result will look like:


To start, take a standard GW base and your 2 part epoxy, whether it be Milliput or the traditional Green Stuff and cut enough from each part so that you'll be able to cover the base.  Mix the two parts together by kneading them together.  Next spread your epoxy evenly across the base's top surface area.


Using a hooked tool, choose a point to begin your first crater.  Pull the epoxy outward from that point.  Use the back of a paintbrush to make a couple (2 or 3) deep indents.  Move on to a ball point pen and make indents all around the  the rest of the top area.  Ball up small pieces to fit into indents made by the paintbrush. Wait 24 hours for the epoxy to cure.


Above are some Insta-Mold pieces.  Using a cup of hot water (180-210 degrees), melt the pieces together.  Kneed them together and cover the base.  


Either wait about 5 minutes or put the base in a cup of ice water.  After it has cooled, remove the mold and set aside the base you made.  Now you'll be able to easily make multiples of that base.


Now comes the tricky bit.  Resin epoxy heats up when it cures, so depending on how deep the Insta-mold casing is, you may need to mix some, let it cure, then finish it up with another mixing of resin.  From my own experience this won't be so big to cause the resin to heat enough to melt the Insta-mold.

Mix your resin in a cup and pour it into the mold.  Allow roughly 30 minutes for the resin to properly cure and remove it from the mold.  Prime it and begin painting as you see fit!  Below are the steps I took to finish my own base.


And there we go.  A suitably alien looking terrain fit for any Daemon army.

Monday, September 19, 2011

Soul Grinder update


Hello everyone, just thought I'd give an update on the progress I'm making on the first Soul Grinder (the other will be soon to follow).  Since this is going to be used in an all Tzeentch Daemon list, I want with Gotthammer's suggestion to highlight with yellow, and I think it really helps add some pop to the model which was missing.


There are a couple things which still need to be painted, though.  The fleshy bits on the front legs and claw are still in need of a paint job, and to be quite honest I'm reluctant to pull out the airbrush to try to paint them (though I will).  The current plan is to wait until the second Soul Grinder is at the same place this one so I don't have to tape off sections a second time around and might save a little time and paint.


I also need to add some highlights to the blades on the sides and the leg shields so they aren't so mono-colored.  The final piece that I'm struggling with are the hoses.  Should I go with the yellow, or keep them black with grey highlights?  Is there another color I should go with, or would that be too distracting on the model?


Hopefully I'll be able to decide what to do soon!