Monday, October 29, 2012

Swamp Bases- Step by Step

Welcome back scratchbuilders and 40k miniature enthusiasts.  Last week I shared pictures of the swamp bases I plan to use for my Chaos Space Marine army, promising I would go over the steps I took to make them.


I started out with a bottle cap which was the size of a 25mm base.  I then removed as much of the side ridges as I desired.  Using the InstaMold, I copied the piece a few times to easily make a couple dozen copies.


After priming the bases, I painted the inside area of the bases with Chaos Black.  I didn't worry about the outer area as I would most likely have to go over it again in the future anyways.


Next, I mixed green ink from Liquitex in a bottle cap with some Turquoise paint.  As you can see, it almost separates at random, creating the look of a green water bottom.


Now is the super cheap part- collect some rocks.  I don't care from where, and I certainly won't tell anyone you took 'em, but rocks are everywhere.  Break them up into manageable pieces using hammers or various vices.  Glue one or two into each of the base areas for a place your model is going to be standing.  I also painted the outside area black.


Mixing Woodland Scenics various static grass flock, such as harvest gold, light green, and medium green, I was able to create grassy areas where  the grass didn't seem all the same.  I also included Secret Weapon Miniatures leaf litter to add the extra variety needed.


In order to add some depth to the grassy areas, took the same mix above and stirred in some Elmers multi purpose glue (aka white glue).  Taking bunches of that, I added them to the base, covering any areas which might need a bit more grass to hide the gaps.


Finally, the two above images show the Realistic Water added to the bases.  This was easily the part which took the longest as Realistic Water has a habit of shrinking... a lot.  In some areas it took 5 fillings to remove the areas in which the Realistic water pulled away.

As of now I have 25 bases.  Hopefully I can find a faster way to create these bases and get them ready for the invading Chaos force which will occupy them!

Sunday, October 21, 2012

Making Swamp Bases

Welcome back, scratchbuilders!  Today I'm going to show off some swamp style bases I created.

When I first began these bases, I thought it would be a simple case of taping up the sides and filling in the extra spaces with some water effects.  Boy, was I wrong!


Check out that disaster!  I liked how the water and the other swamp area looked, but the outer edge of the bases are horrible.  This is when I decided I had to make my own bases with a closed in area to ensure the water effects don't spill over or look uneven, not unlike the bases used in Malifaux.

To do this, I used a bottle cap which had the same width of the bases, 25mm, and then then duplicated them.  I won't go into how I created the bases this week, but I will happily show off the bases I made.


I love these bases.  I can't wait until I have enough for all the Chaos models I plan to put on them!  Next week I will go step by step on how I made the bases and explain just how simple they were to make.

Sunday, October 14, 2012

Painting Typhus- From Beginning to End

Hello fellow scratch builders and money savers!  I've been working on the Typhus model i received with my Chaos Codex and thought it might be fun to go over the thought process I followed in painting him.


Here we have the primed, unpainted model.  This being my first Finecast model, I was pleasantly surprised at how well it looked.  I've heard a lot of concerns regarding Finecast, but it seems as thought GW has worked through most of the early problems they had.


Base color put onto the model, a Vallejo green color I found at a local hobby store, German Fieldgrey WWII.


Here I used Liquitex's green ink added to the model to add darkness to the recessed areas.


Yes, I drybrushed over the ink using the German Fieldgrey WWII, and no matter how often I see people complain about the technique, I can't help but continue to use it.  It's fast and effective.  I also mixed the Fieldgrey with Game Color's Bone White.  German Grey was used as the base coloring for the grey areas, highlighted with White.


Began painting the browns on the scythe, the nurgling, and the pouch.  Game Color's Chocolate Brown as a base color for the wood, highlighted with Game Color's Filthy Brown.  For the Nurgling and the pouch I started with Game Colors Chocolate Brown, highlighted with Filthy Brown and Green Ochre.


Here we see an actual divergence in the model, noticing more highlights, the reddish/brown coloration to the bulbous areas and the highlights to the pouch and Nurgling.


And here is the base I decided to create.  I wanted something somewhat swamp like.  I knew vegetation would be essential to the base, and was unsure how to create the proper look to thick vegetation.  To solve this, I decided to take the static grass and leaf mixture I created and simply added some PVC glue (commonly known as white glue, like Elmers) and stirred it up.  Instead of appearing thin, the base looks full and filled with vegetation.


Here I've added more highlighting and added an arm under the vegetation.


And the 'final' images.  Added additional details to the Nurgling such as the teeth and eyes, some more brown highlights on the armor, and detailed the scythe.  On Monday I plan to pick up some easy water effects to add to the outer areas where the swamp water is meant to be.  I may do some testing on another base first to ensure I don't make a horrible mistake on this model as I'm quite happy with how it turned out.

Till next time, take care and happy gaming :)

Monday, October 8, 2012

Taking Pictures- An Amateurs Journey, part 2

Welcome back everyone to SB40k.  Today I continue my thoughts and experiences in taking pictures of my minis.

As a continuation of the post I made last week, I'd like to look at past images I've taken of models and what they look like now with proper lighting and no image editing beyond cropping the image.

Lets start with the Gaulrach model I've been using as Fateweaver-


This is the old image I had been using for quite a while now.  There seems to be plenty of lighting, but the colors seem off, don't they?  The blues appear to be glowing, the purples unnatural, and the plane is obviously apparent by the background line.


These two I took a couple days ago with the new camera and lighting The lighting seems more natural, not overly filtered.  The blues no longer look like they glow and the contrast isn't as obviously tweaked as it was in the original image.


This image would look fairly well if it wasn't for the poor lighting.  As you can tell, there is more light coming from the left side of the image, leaving the area underneath looking overly dark


In the new images, the lighting is more even, using lighting from above, the front left, and front right areas to evenly distribute the light upon the model.  Also, the flash was used in this image, filtered through multiple layers of tissue paper to get just the right effect.

Overall, I'm much happier with the new images.  They are cleaner and display the models as they appear without requiring a lot of touch up in paint programs.

Instead of babbling on, I'll just share a couple more photos I took and leave it at that.  Till next time, happy gaming!


Saturday, October 6, 2012

Taking Pictures- an Amateur's Journey

Hello all, welcome back to SB40k.  Today I'd like to tell you about my journey from the miserable, washed out, color inaccurate images, to what I believe is a marked improvement of image quality.

First things first- I, most probably like you, am not a photographer.  I started out with the Kodak EasyShare C813, an $80 Walmart special.  In the daylight, it took ok photos, though anything in sub-optimal lighting was disappointing.  A week ago I decided I wanted a decent camera to take pictures with, deciding on Canon's PowerShot SX500 IS after trying out some cameras at the local electronics store.

I took my camera home, super excited about the amazing images I would get out of my fancy new camera.  After about 40 or so pictures, I noticed a trend- they were still looking washed out.  AURGH!  Such frustration.  Still, I knew my wonderful new camera had potential (didn't all the reviews say so?) and didn't give up.

Any of you who have searched the internet for information on how best to take images of your miniatures will know how nearly impossible it is to find good information.  It's either very technical and confusing, or doesn't address the problem.

So here I sat, confused and unhelped by the internet photography gurus, holding my $300 camera and scratching my head.  And after a while, I just took photos.  Here is what I discovered.

1.  Use a white, ascending backdrop- Miniatures look much better when they aren't interrupted by a plane line behind them.  Obvious horizontal and vertical surfaces take away from the image.  It will also help with lighting, especially with the white background.

2. Use lots of lights, very close to the miniature-  I have 3 different lights, an Ott light on the left, a desk incandescent light on the right, and an off-white bulb overhead, all covered in tissue paper to diffuse the light and prevent hard shadows.  Keep the lighting close to the image so you won't have to rely on flash, which is horrible for miniature photography.

3. Try every setting on your camera if possible-  Seriously, try it all.  Macro close, macro far.  Flash, no flash.  Adjust your ISO settings (if your camera has it) and take an image with each.

4. Don't rely on Auto functions-  These are terrible, and colors will NOT look they way they really look, even when you are taking your pictures.

5. Check your lighting functions on the camera-  Does your camera have settings for outdoors?  Inside lighting with outdoor lighting?  Overcast lighting?  Incandescent lighting?  Florescent lighting?  All of these options make an enormous difference on how your pictures will turn out and whether the colors will look the way they really do with the naked eye.

6. My color settings- This was what helped me find what I needed to get the images perfect.  Modern cameras have settings which allow the photographer to imitate color film, black and white film, vivid colors, and other settings which can help to get the image just right.

7. Don't be afraid to move your lighting around-  If shadows seem odd, move a light.  Change the angle.  Don't be afraid to try something different to get a new result

8. Finally, take lots of pictures with your different settings-  If you want to be able to come away with the images you can be proud of, you'll need to get the image right.  This will require practice, eventually leading to experience.

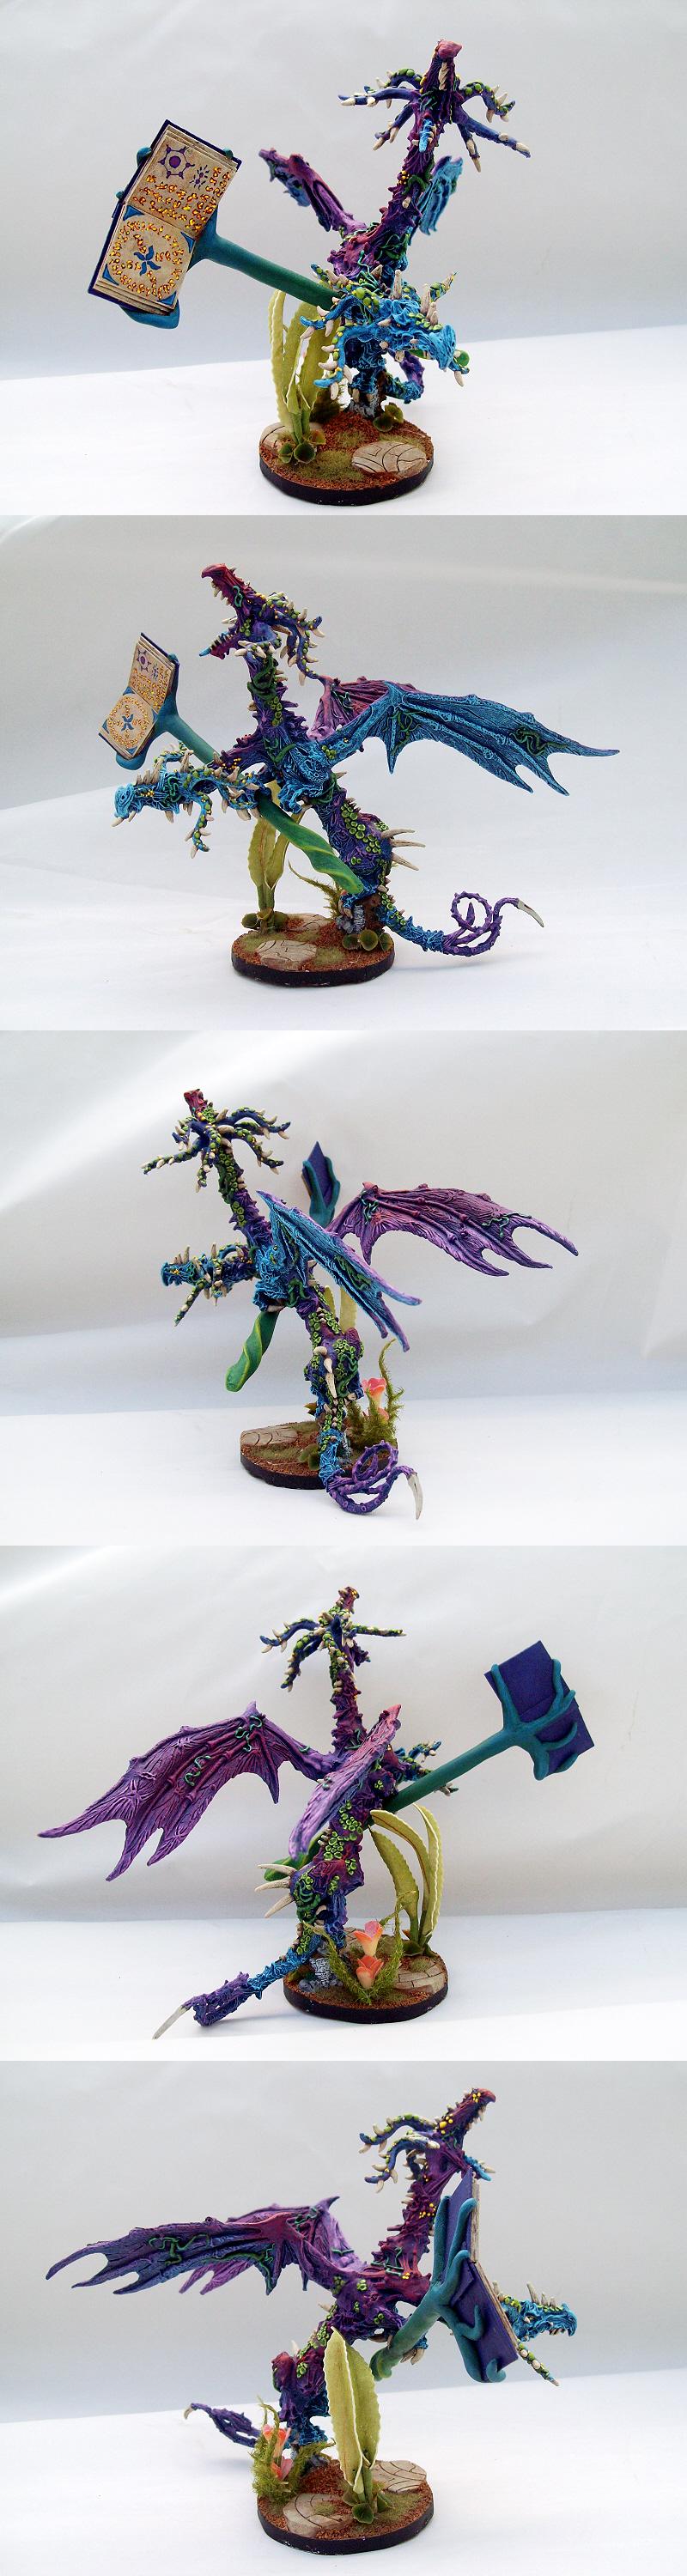
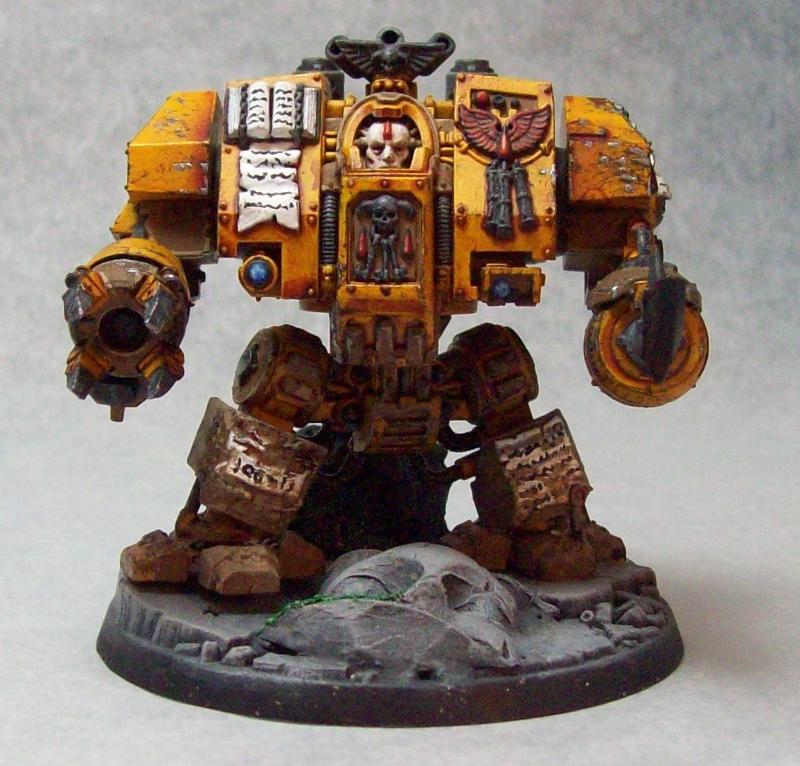
Now, I'm still not an expert, but I think I have experienced the 'ah-HAH!' moment I needed to break through the horrible pictures I've taken in the past to come out ahead of the curve.  Here is the first image and the final image of the Abaddon the Despoiler I took practicing with the camera.  I think the differences speak for themselves.


Lets look a the image above and point out what's wrong with it.  First, the shadow behind the model is distracting.  The colors look washed out and overly bright in some areas, indicating a flash was used.  The purple cloak looks too blue, and the yellow/brown gold areas looks incorrect as well, almost garishly bright. The white areas are almost obscene and unrealistic.  Overall, not a terrible picture, but a picture which can be achieved with little effort.


Low lets look at the final image.  This is the closest to what the actual model looks like.  the purples are closer to their actual color (though still a little off), the reds look spot on to the burgundy/red I applied to the model, and the whites no longer have the obscene glow to them.  The yellow/brown areas now look like the golden coloring they were meant to have.

Overall, I am happy with the final results.  I may need to replace the above light bulb to a white incandescent to match the other two lights, but overall this is almost spot on to how the model looks up close.

Well, I hope you've all enjoyed my journey, and if you have any experiences you'd like to share with your photography journey, I'd love to hear/see them!  Till next time, happy gaming!