Materials Needed:
Cardstock (3/16" thickness)
Plasticard (For Sale signs)
Tools Needed:
Hobby knife
Hot glue gun
White glue (Elmers, etc)
Standard size hole punch
3/4" hole punch
Metal ruler
First, use the following template to make 4 wheel rims cut from the Cardstock.

Now, using the scrap pieces you have lying around, hot glue 3 pieces of Cardstock together and hot glue another wheel rim to them. Do this again for the other two wheel rims.


Draw 8 1 1/2" diameter circles on the Plasticard and use your hobby knife to cut them out. Glue them with the white glue to the side of the wheel rims at the front and back. Now use the 3/4" hole punch and cut 14 circles from the Plasticard. Use your hobby knife to cut these circles in half. Using white glue, attach these half circles in the pattern shown in the image below. Repeat this on the other side and on the second wheel rim.

Now use your hobby knife to cut the following shape out of the Plasticard. Make 4 of these.

Glue a piece to either side of the wheel rim.

Next cut the following shape from the Cardstock and glue it using the super glue to the wheel rim.

On the other rim glue it to the other side. This is very important as this forms the outside details of the tank. If you are concerned about mixing this bit up, you may save this step for after you attach the tanks cab pieces.

Now using the standard size hole punch make 28 circles from the Cardstock. Use the white glue to glue them in the way it appears in the above image.
Cut rectangular pieces of Cardstock in these shapes; 2" by 3" (bottom piece), 2" by 2 1/2" (back piece), and 2 by 2 11/16" (top piece). Starting with the bottom piece, glue horizontally 5/8" from the bottom of the inside of the wheel rim as close to the center as you can (there should be roughly 1/8" either side showing the inside detail plasticard). At a 90 degree angle (vertically) glue the back piece to the back of the tank (the area without the extended slope)- this will be on top of the bottom piece, not behind it. Finally, glue the top piece horizontally, starting in front of the back piece.

Now cut a piece of Plasticard which is 3" long by 2" wide. Split the 3" area in half by lightly scoring the Plasticard and gently bending it to create an angled area. Glue it into place as it appears above.
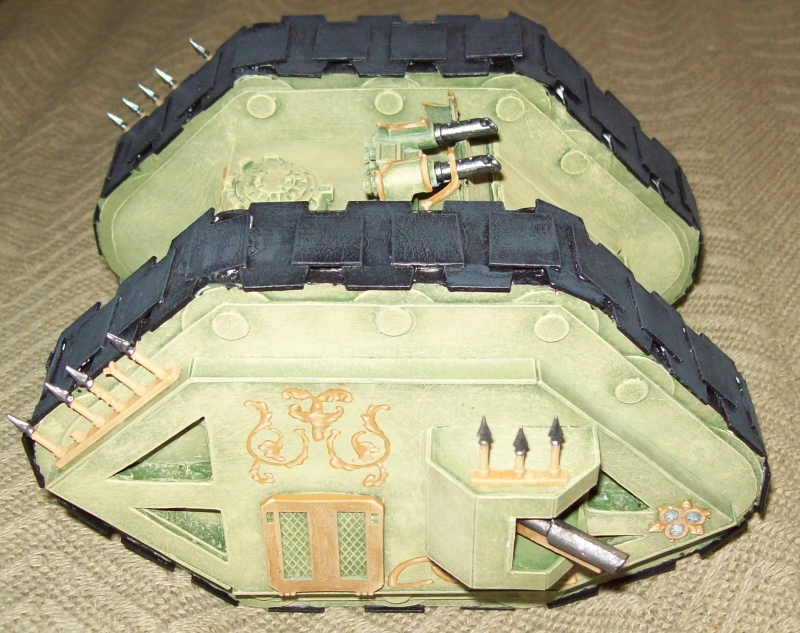
Finally, use 3 pieces of Cardstock to prop the bottom of the tank and the one wheel rim. Apply glue to the tanks cab area and attach the other wheel rim.

That completes the first part of the Mk 1 Landraider tutorial.
Thanks everyone for being so patient and checking in after the long absence. Next time we will tackle the front door hatch, side lascannon turrets, and some other details. Take care all!
No comments:
Post a Comment